


A Guide to Content Projection in Angular: Step-by-Step
Building a Burger with Angular Content Projection


Table of contents
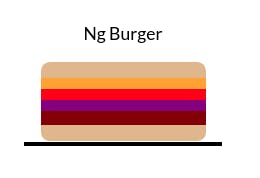
One of the simplest dishes to prepare is a burger. Though the base remains the same, its contents can vary – so let's create our versatile burger component.
Today we explain how to use ng content to provide an area flexible and multiple slots.
Use ng content for content projection.
Use multiple slots for content projection.
If you want to play with the https://burger-angular-content-projection-demo.stackblitz.io
Our scenario.
We have a list of ingredients components to be use to prepare our burger component. html <top-bun></top-bun> <cheese></cheese> <bottom-bun></bottom-bun> <tomato></tomato> <onion></onion> <meat></meat>
The main idea is to create a burger component and put our ingredients inside, like a regular burger using two excellent angular feature content projections.
Content Projection and ng-content
Angular allows us to make our components reusable using content projection. It will enable declaring an area suitable for changes, inside or a member.
It helps us provide a wrapper and define which information or piece is part of the component.
Using the ng-content tag, we tell angular to replace the ng-content area with our elements or component.
First, create the burger component and use the tag ng-content in the template.
import { Component } from '@angular/core';

@Component({
  selector: 'burger',
  templateUrl: './burger.component.html',
})
export class BurgerComponent {}
<div class="burger">
  <ng-content></ng-content>
</div>
Perfect, step complete, move the ingredients to the body of the burger component.
<burger>
  <top-bun></top-bun>
  <cheese></cheese>
  <tomato></tomato>
  <onion></onion>
  <meat></meat>
  <bottom-bun></bottom-bun>
</burger>
It works. The burger component allows child elements components into it, and the Burger acts as a wrapper.
Why is the meat not in the middle?
Multiple slots
All burgers have meat in the center. We want to be flexible to add components or force without breaking our Burger, so the burger component needs to render elements in a specific area.
The ng-content has an optional property, selector, to get the content related to css selectors like class or attributes, so we define the areas.
Update the default burger with the following:
add top-bun and bottom-bun as default for all burgers.
3 ng-contents with the selector top, middle, and bottom
ng content for the price
default ng-content for ingredients without location.
<div class="burger">
  <top-bun></top-bun>
  <ng-content select="[top]"></ng-content>
  <ng-content select="[middle]"></ng-content>
  <ng-content select="[bottom]"></ng-content>
  <bottom-bun></bottom-bun>
</div>

<div class="price">
  <ng-content select="[price]"></ng-content>
</div>

<div>
  <p>These ingredients don't have a location</p>
  <ng-content></ng-content>
</div>
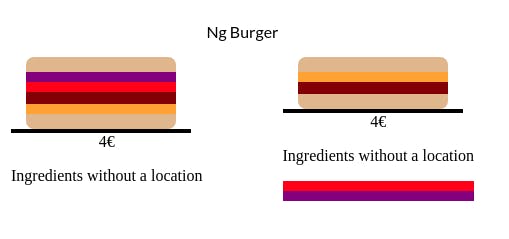
We have ready our burger component. If some ingredients or pieces don't have the location, they will move to another div.
The tomato and the onion don't have attributes, so go to the default ng-content.
<!-- Burger with ingredients without location.-->
<burger>
  <tomato></tomato>
  <cheese top></cheese>
  <meat middle></meat>
  <onion></onion>
  <span price>4€</span>
</burger>
Done!
We've created a reusable component featuring content projection, allowing for the effortless construction of new burgers. This component ensures that essential elements are placed in specific areas, as well as default locations.
[stackblitz.com/edit/burger-angular-content-.. with demo)
That's it! Hopefully, this will provide you with some assistance regarding ng-content and enhance the flexibility of your components.
If you enjoyed this post, share it!
Photo by Haseeb Jamil on Unsplash