How to Build an In-Memory CRUD REST API with Nest and Deploy on Vercel

In my previous article, we got started with API creation in Nest, we learned about how to create a controller and add methods on it with decorators to allow getting and posting data it is a very basic example. When we want to have better examples or MVP, allowing operations like Create, Update, Read, and Delete (CRUD), is better than just reading data.
Today we will take a step forward, allowing us to perform CRUD operations in our example API and deploy to Vercel.
Scenario
In the previous article, we created the jumbo_api, it has the Cards controller which provides three methods:
-
list: return a hardcoded list of cards.
-
generate/:name: get name parameter, return a non-typed entity with the name as a parameter with the logic in the same method.
-
subscribe: Post the body and return a non-typed object with the body and extra properties.
If we want to implement CRUD operations and enhance the code, we can consider the following steps:
-
Ensure a card entity is returned.
-
Extract the logic from the controller.
-
Store in memory and return the data,
-
Add endpoints for deleting and updating the data.
Does it seem like too much work? Not at all! Nest makes it easy for us.

Setup Project
Clone the previous project, navigate to the jumbo_api which has the card's controller, and run the npm i command, and open with your favorite editor.
To follow the article easy, please use start_point branch
git clone https://github.com/danywalls/jumbo_project.git
git checkout start_point
cd jumbo
npm i
Perfect we are ready, Let extract the logic from the controller.
Card Entity
In the initial article, we the getAll, generateCard, and subscribe methods each returning a non-type object with occasional missing properties. This approach is not good for the CRUD because we want to validate all necessary properties.
We solve it to create an entity type to represent our card, it works as a contract for our methods and the consumer.
Go to the cards directory and create cards.entity.ts
export type Card = {
  id: number;
  code: string;
  validDate: string;
  holder: string;
};
Perfect, we have a contract for our methods and response, so we can continue to move the logic away from the controller.
The CRUD Service
In Nest, similar to Angular, we can use a service to separate the logic from components. Nest uses the controller to handle and manage requests, but any processing we want to do with them should be handled by the service.
The service takes care of the logic in the application, so we can reuse the logic in another place in the API. To create a service similar to the controller, we use the nest CLI with the command `nest g `
dany ~/Desktop/jumbo/jumbo_api [main] $ nest g s
? What name would you like to use for the service? cards
CREATE src/cards/cards.service.spec.ts (453 bytes)
CREATE src/cards/cards.service.ts (89 bytes)
UPDATE src/app.module.ts (394 bytes)
The CLI automatically registers it in the app.module.ts providers section. For Angular developers, this may sound familiar, but for non-Angular developers, let me explain what it does.
The providers allow us to register types or classes with the @Injectable decorator when other classes request one of these types in the constructor Nest dependency injection. provide an instance of them.
How to inject the cards.service into the cards.controller.ts ? In the constructor declare a new parameter for example cardsService of type CardsService. Nest knows the CardsController needs an instance of cardService and will provide it.
....
import { CardsService } from './cards.service';

@Controller('cards')
export class CardsController {
  constructor(private readonly cardService: CardsService) {}
Add CRUD Actions to Service
We have a service, but it must provide the CRUD actions and an in-memory state for the controller. We first create a card array, it will work as our in-memory storage.
private cards: Array<Card> = [];Using the cards as storage we must provide the following methods:
-
GetAll: return all cards stored in the cards array.
-
GetById: return a card that matches with the ID.
-
Create: create a card object and save it into the cards array.
-
Update: update a single card, it uses the GetById method to get it and update if exists.
-
Delete: get the parameter ID and find the index in the cards array to delete it if exists.
Let's code each one!
GetAll
This method takes no parameters and returns the private cards array.
 getAll(): Array<Card> {
    return this.cards;
  }
GetById
This method takes the card ID as a parameter and uses the find method from the cards array to return a single card.
getById(id: string): Card {
    return this.cards.find((card) => card.id === +id);
}
Create
This method gets a card of type Card and stores it in the cards array.
  create(card: Card) {
    card.id = Math.random();
    card.validDate = new Date().toLocaleDateString('ES');
    this.cards = [...this.cards, card];
  }
mmm.. hold a second? help me out here.. if the create method expects a card, mean that the controller must add the logic for the ID and valid date?
The idea of the service is taking away any logic from the controller, so just for now we going to change to optional some fields or any? (pick your poison )
We will to improve it later , becase it is not good approach to continue change to any.
 create(card: any) {
    card.id = Math.random();
    card.validDate = new Date().toLocaleDateString('ES');
    this.cards = [...this.cards, card];
  }
Update
This method takes two parameters the card ID to update and the new values for the card. Similar to the create method, we cannot force the controller to send all properties again we change the type to any (but we must fix it).
update(id: string, updateCard: any) {
const indexToUpdate = this.cards.findIndex((card) => card.id === +id);

    if (indexToUpdate >= 0) {
      this.cards[indexToUpdate] = {
        ...this.cards[indexToUpdate],
        ...updateCard,
      };
    }
  }
In the code we find the index, if exists destructuring the current value and merge with updateCard.
Delete
This method takes the card ID and uses the findIndex method to get the position and splice to delete it.
delete(id: string) {
    const cardIndex = this.cards.findIndex((c) => c.id === +id);
    if (cardIndex >= 0) {
      this.cards.splice(cardIndex, 1);
    }
  }
Perfect! The next step uses the cards service logic into the cards controller.
Integrate Service with Controller
Since the Card Service is injected into the constructor, we will update and create new endpoints to utilize the card service functionality.
-
Update
@Getendpoints/listand/list:idand read values using@Param()decorator. -
Update the
@Postendpoint subscribe method and get the values from@body
GetAll and GetByid
Change the getAll method in the controller by invoking cardService.getAll() to retrieve the list of cards.
Establish a new endpoint, list/:id, which accepts the id through a parameter to pass it into the getById service method.
  @Get('list')
  getAll(): Array<Card> {
    return this.cardService.getAll();
  }

  @Get('list/:id')
  getById(@Param('id') id: string) {
    this.cardService.getById(id);
  }
Create
The subscribe method employs the @Body() decorator to extract the value from the POST request, and take the body to pass cardService.create(body) method.
  @Post('subscribe')
  @HttpCode(HttpStatus.OK)
  subscribe(@Body() body) {
    this.cardService.create(body);
  }
Update and Delete
NestJS provides a decorator for delete and update actions, but the update has a special case that is important to understand.
In Rest API, we have two methods for updating data `PUT` and `PATH`:
-
put: replace the entire resource, so we need to have the entire object within the request payload.
-
path: it only modifies a resource partially, allowing us to update a specific part of our resource.
Nest provides decorators to make easy work with those verbs @Path() and @Put() .
Sound similar to update forms in Angular with patch and setValue
Create a new method called 'update', using the decorator @Path() with the path 'subscribe:/id'. Add two parameters: the 'id' using @Param and the 'object' using @Body. Take these parameters and pass them to the cardsService.update
  @Patch('subscribe/:id')
  update(@Param('id') id: string, @Body() body) {
    this.cardService.update(id, body);
  }
Finally the delete, we use the @Delete decorator and read the id to this.cardService.delete method.
 @Delete(':id')
  delete(@Param('id') id: string) {
    this.cardService.delete(id);
  }
Perfect, we finished implementing our service into the controller. Save changes and run npm run start to test the API with PostMan.
API in Action
Similar to what we did in the previous article, we interact with the HTTP verbs:
Post: send a post request in the body and send the holder property.

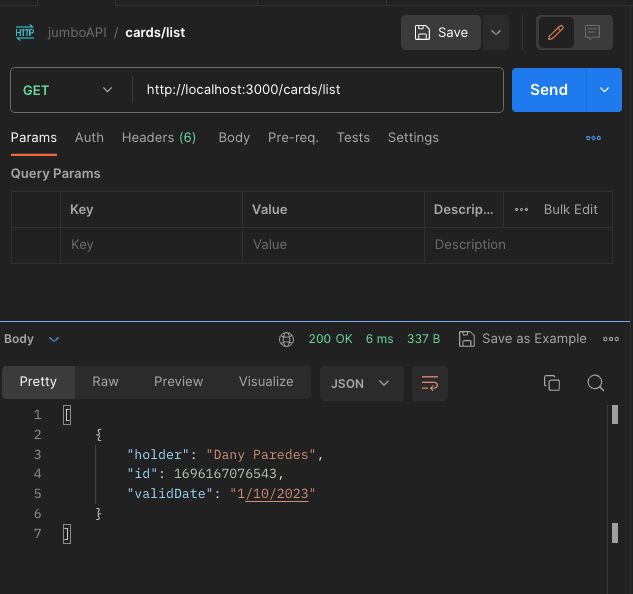
To update first we need to know the ID of the card, so use the list endpoint with a request:
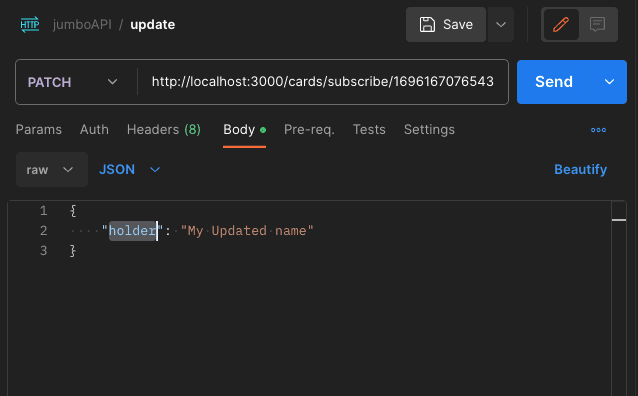
Take the ID and send a PATCH request to cards/subscribe/yourid endpoint, in the body, send the new holder name:
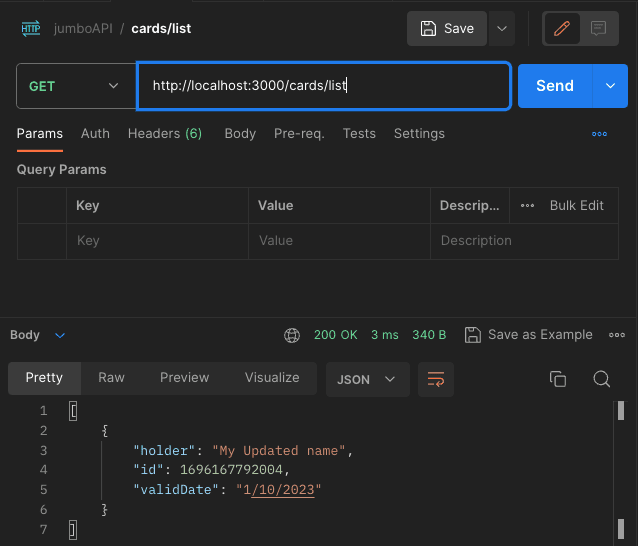
To confirm, call the endpoint 'cards/list' again with a GET request, and the resource will return with the updated data.
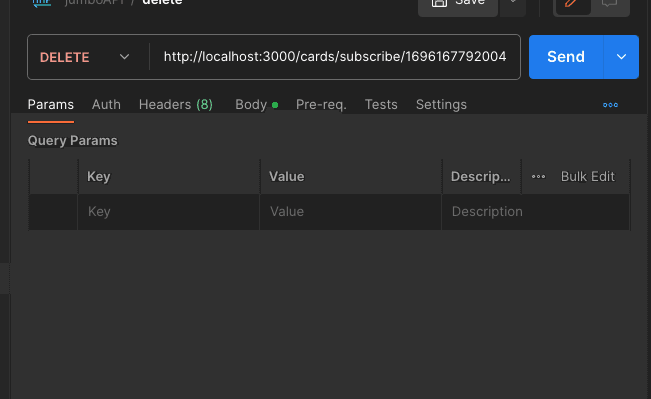
Finally, take the ID again and send a delete request to cards/subscribe/yourid endpoint.
To confirm, call the endpoint 'cards/list' again with a GET request, and the resource will return an empty array.
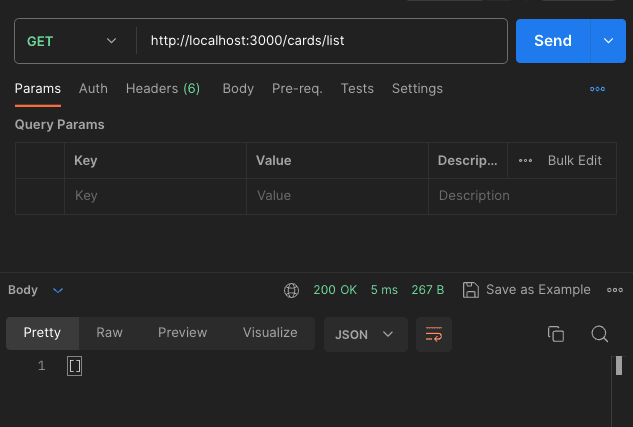
Yes! We extend the API allowing us to create, edit, and delete data also saves the data in memory, as long as you don't restart your API. ;)
Deploy Vercel
One missing step in the previous article and requested by some readers was where and how to deploy the API. In my case, I recommend deploying to Vercel because easier.
First, you must have a Vercel account and connect with GitHub, in the main root of jumbo_api we create a new file: vercel.json
{
  "version": 2,
  "builds": [
    {
      "src": "src/main.ts",
      "use": "@vercel/node"
    }
  ],
  "routes": [
    {
      "src": "/(.*)",
      "dest": "src/main.ts",
      "methods": ["GET", "POST", "PUT", "DELETE"]
    }
  ]
}
Save and push your change to the repo, go to https://vercel.com/new/import and import your project.
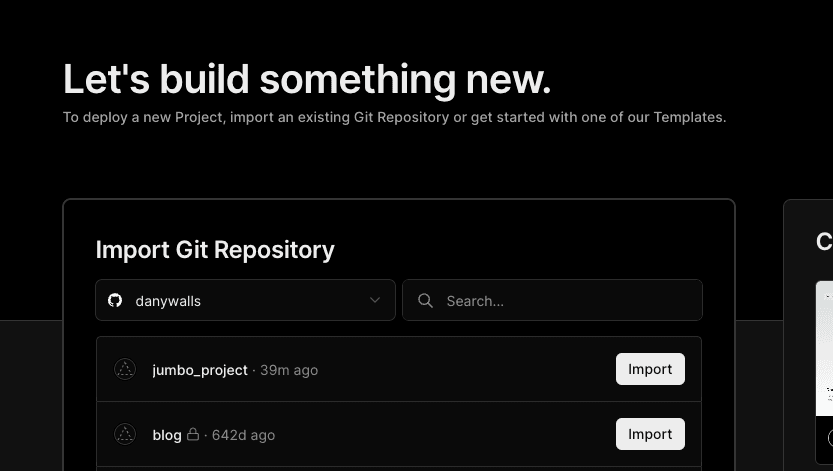
Because we have two projects in the repo jumbo, we must select jumbo_api:
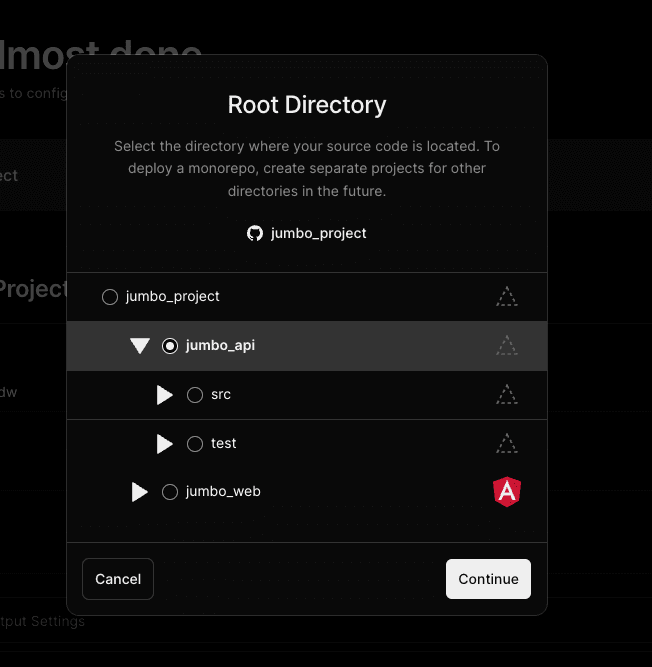
Select the project, click the continue button, and then press the deploy button. Wait for the process to finish.
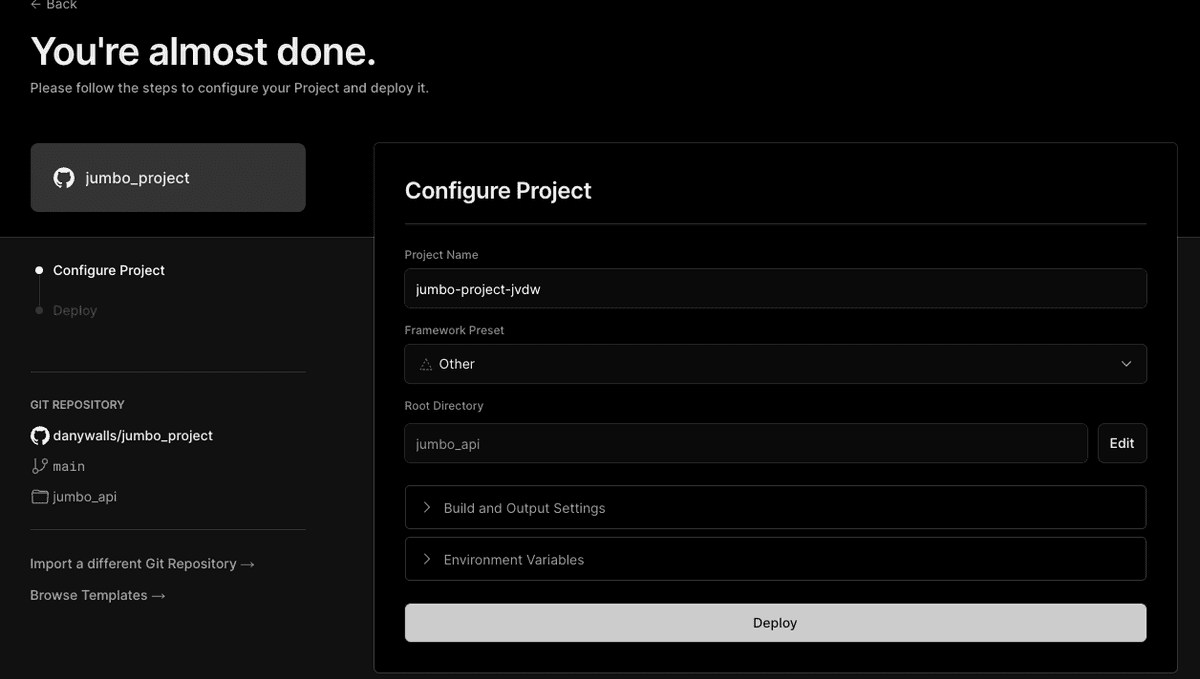
Once completed, a screen featuring confetti will appear, indicating that your API has been successfully deployed!
Feel free to play my live version https://jumbo-project-bzku.vercel.app/cards/list
Conclusion
In this article, we advanced our API creation with Nest by implementing CRUD operations in jumbo_api. We created a card entity, extracted logic from the controller, stored data in memory, and added endpoints for updating and deleting data. Additionally, we learned how easy it is to deploy the API on Vercel.
If you're interested in learning more, feel free to check out the official documentation or subscribe for future articles.
If you're curious, go ahead and take a peek at the source code. Yay!
Real Software. Real Lessons.
I share the lessons I learned the hard way, so you can either avoid them or be ready when they happen.
Join 13,800+ developers and readers.
No spam ever. Unsubscribe at any time.